Once you have created your teacher account on Danceable, you can begin publishing your classes and making them available to students.
In this step-by-step tutorial, you will learn how to create your first class, add its schedule and location, establish your pricing, include media, and publish the finished listing.
1. Start from your Danceable dashboard
Sign in to your Danceable account and open your teacher dashboard.
Select the option to create a new class, and then click Create Class.
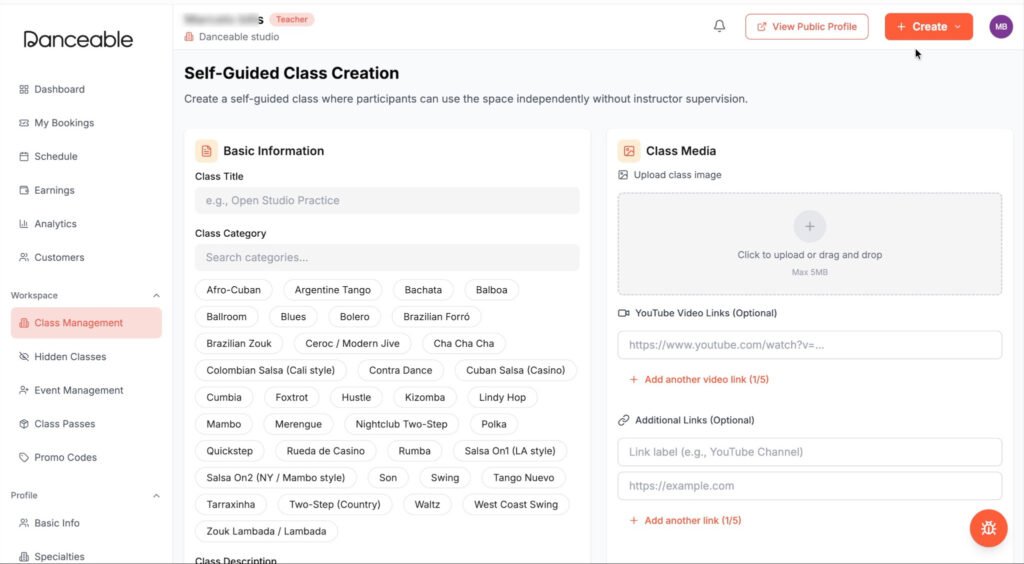
2. Enter the basic class information
Start by entering the name of your class.
For example:
Group Tango Class
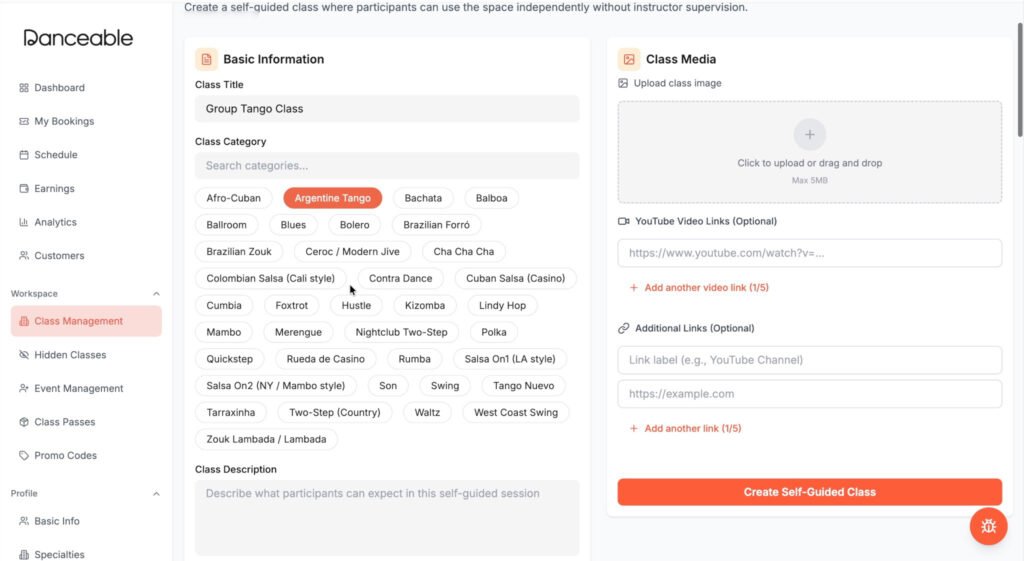
Choose the appropriate dance style or category. In this example, we are selecting:
Argentine Tango
Add a short description that clearly tells prospective students what the class offers.
For example:
Argentine Tango group class for dancers of all levels.
Keep the description concise, but include enough information to help students understand what they will learn and whether the class is right for them.
3. Select the class type
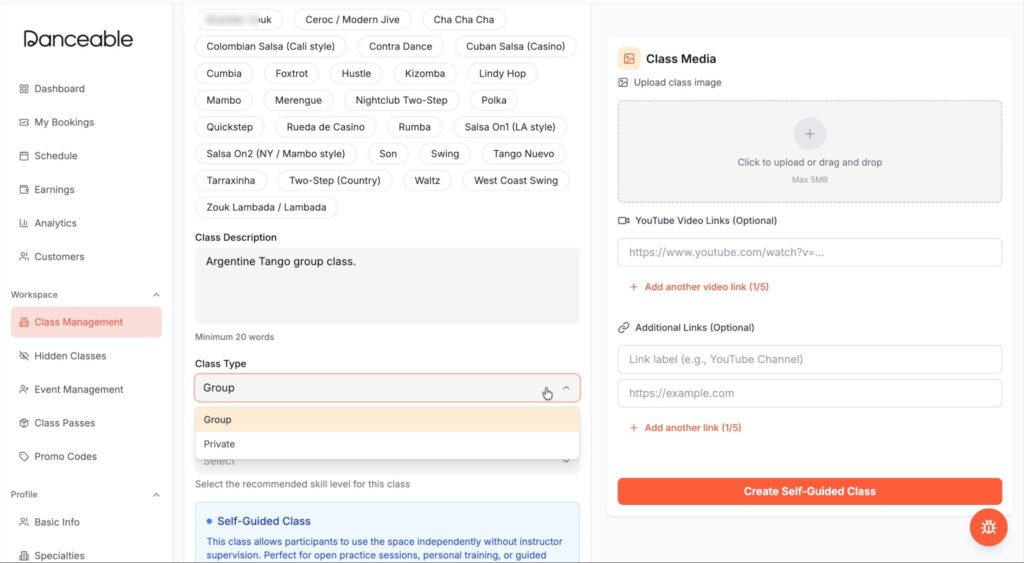
Choose the correct format for your offering:
- Select Group for a group class.
- Select Private for a one-on-one private lesson.
For this example, select Group.
4. Choose the skill level
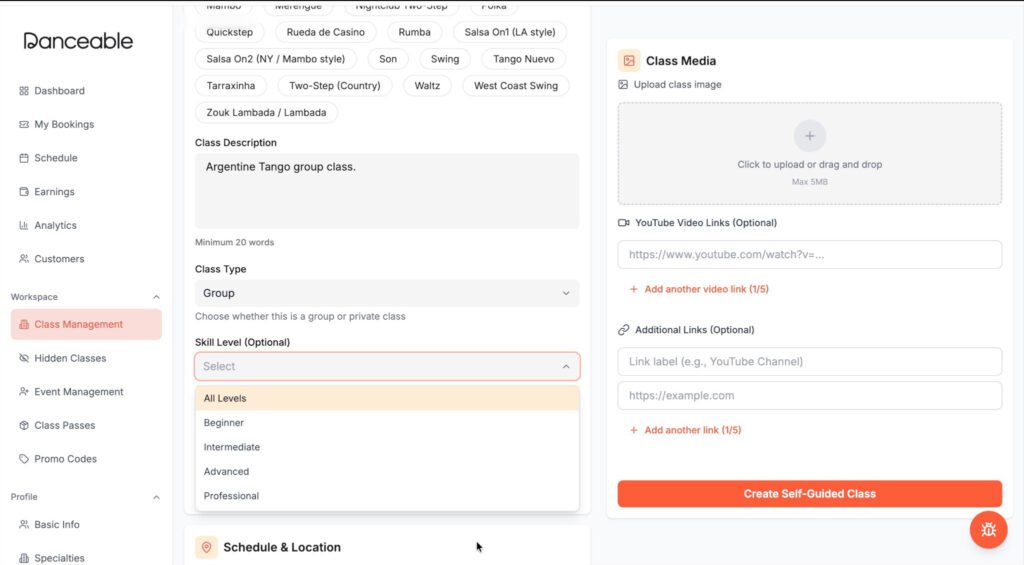
Select the skill level that best represents the class.
Depending on your offering, you may choose a specific level or make the class accessible to a broader range of students.
For this example, select:
All Levels
Be accurate when choosing the level. Labeling an advanced class as “All Levels” may attract students who are not adequately prepared, while labeling an accessible class too narrowly may discourage appropriate students from registering.
5. Add the class location
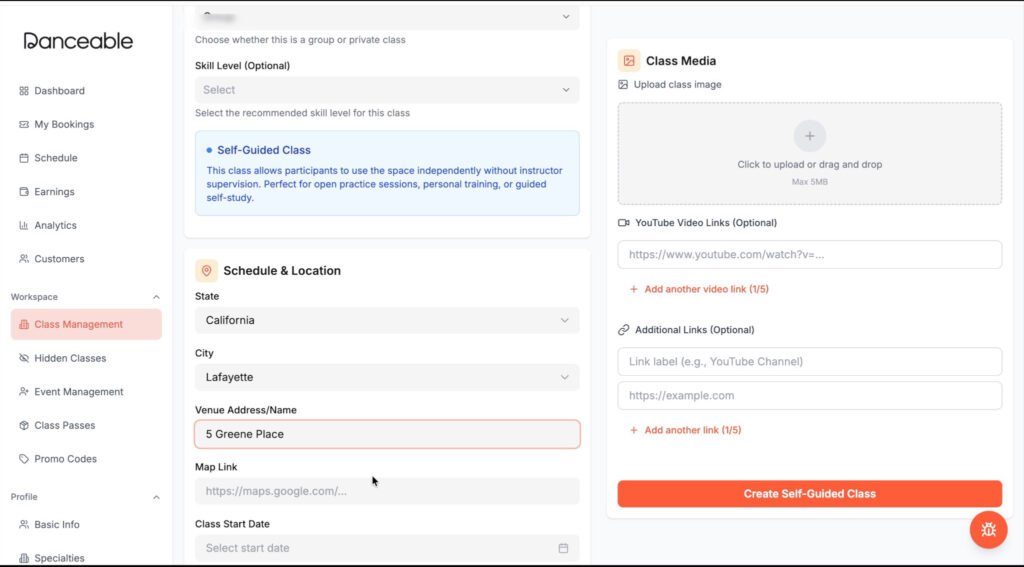
Enter the geographical information for your class:
- State
- City
- Complete address
For example:
Lafayette, California
You can also add a Google Maps link. This makes it easier for students to find the location and reduces last-minute questions about directions.
Before publishing, verify that the address and map link point to the correct entrance, particularly if the class takes place inside a larger venue.
6. Set the class dates
Choose the date on which the class begins.
If it is an ongoing class, select an end date far enough in the future to cover the expected class cycle. You can update the listing later if your schedule changes.
In the example shown in the tutorial, the class continues for one year.
Avoid publishing an indefinite schedule that you are unlikely to maintain. A realistic end date helps prevent students from finding and attempting to book an outdated class.
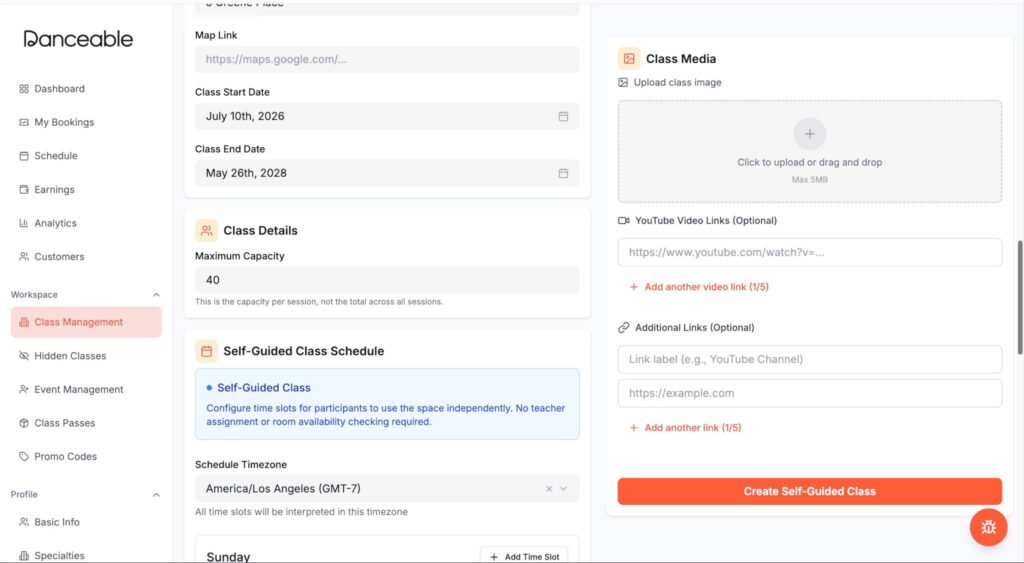
7. Set the maximum capacity
Enter the maximum number of students who can attend the class.
In the tutorial example, the final capacity is:
40 students
Capacity should reflect the actual size of the room, the teaching format, and the number of students you can safely supervise. A larger number is not automatically better. Overcrowding damages the student experience and can create safety problems.
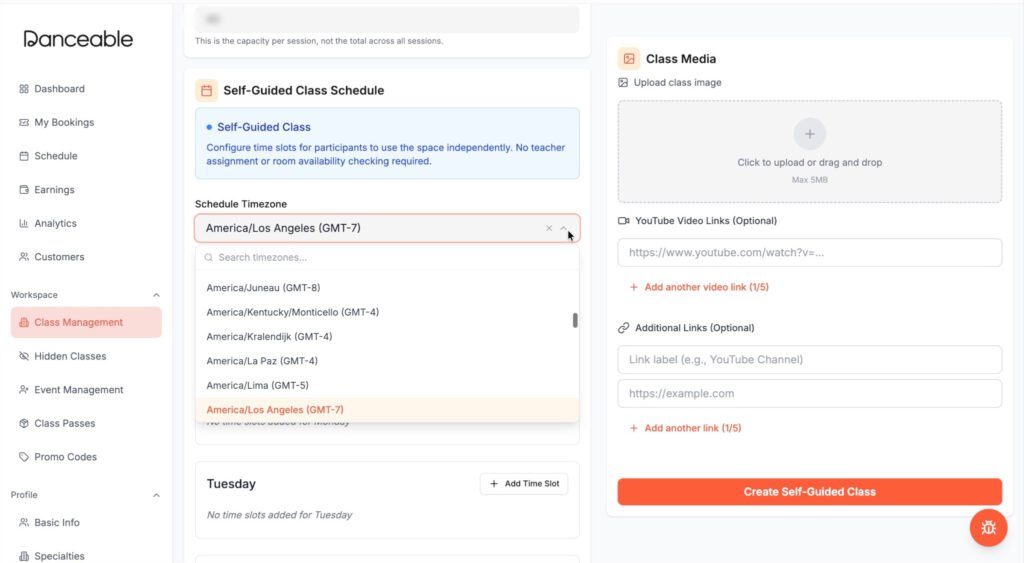
8. Choose the correct time zone
Select the time zone where the class takes place.
For a class in California, choose:
America/Los_Angeles
This corresponds to Pacific Time.
Choosing the correct time zone is essential. An incorrect setting can cause students to see the wrong class time, especially when they view the listing from another region.
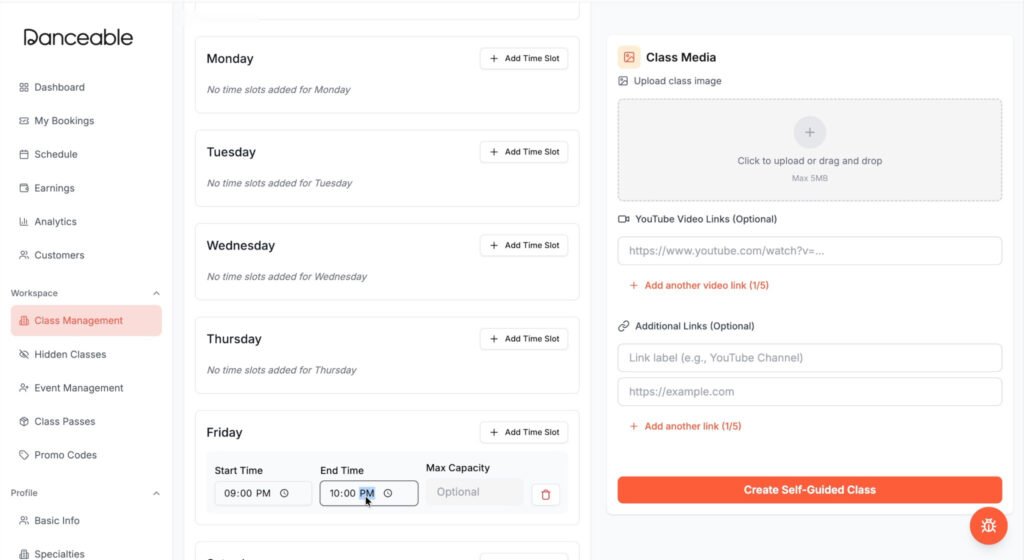
9. Create the weekly schedule
Choose the day of the week on which the class meets.
In this example:
Friday
Next, enter the beginning and ending times.
For example:
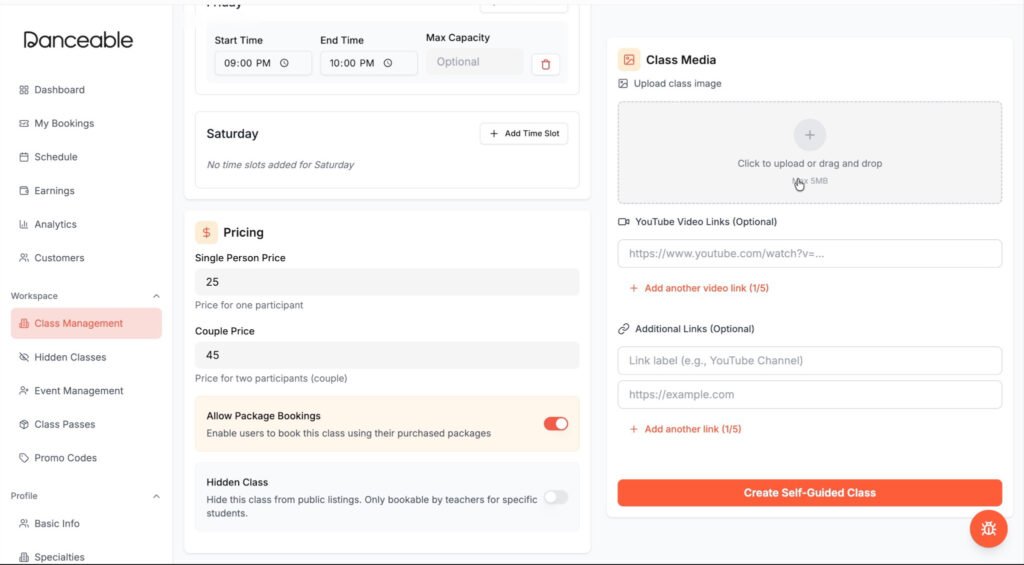
9:00 PM to 10:00 PM
Review the day and time carefully before continuing. A simple scheduling error can result in bookings for a class that does not exist.
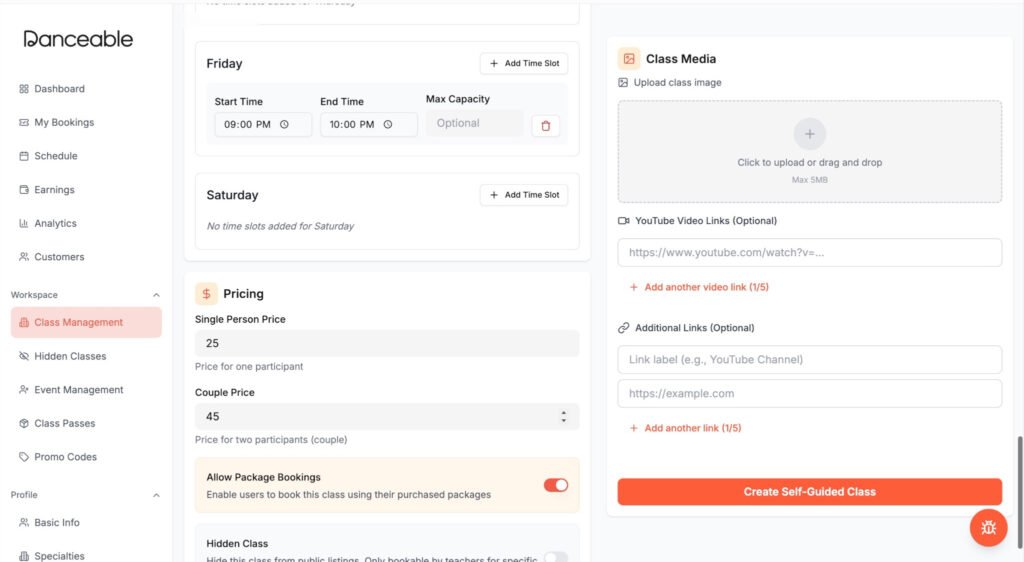
10. Add your pricing
Enter the price for one person.
For example:
$25 per person
If you want to encourage partners to register together, you may also offer a discounted couple price.
For example:
$45 per couple
Make sure the difference between individual and couple pricing is clear. Students should immediately understand whether the couple price covers one person or both partners.
11. Add media and useful links
Media can make your class listing more informative and attractive.
You can add:
- A YouTube video
- A promotional or demonstration video
- A link to your website
- Additional information for students
- Other relevant registration or venue links
Use media that accurately represents the class. A beautiful but unrelated performance video may attract attention while creating the wrong expectations about what students will actually learn.
12. Review and publish your class
Before publishing, review the complete listing and confirm:
- The class name and description are correct.
- The dance style and level are accurate.
- The class type is correct.
- The address and map link work.
- The dates and weekly schedule are accurate.
- The correct time zone is selected.
- The capacity is realistic.
- Individual and couple prices are clearly stated.
- All media and external links work.
When everything is ready, click Create Class.
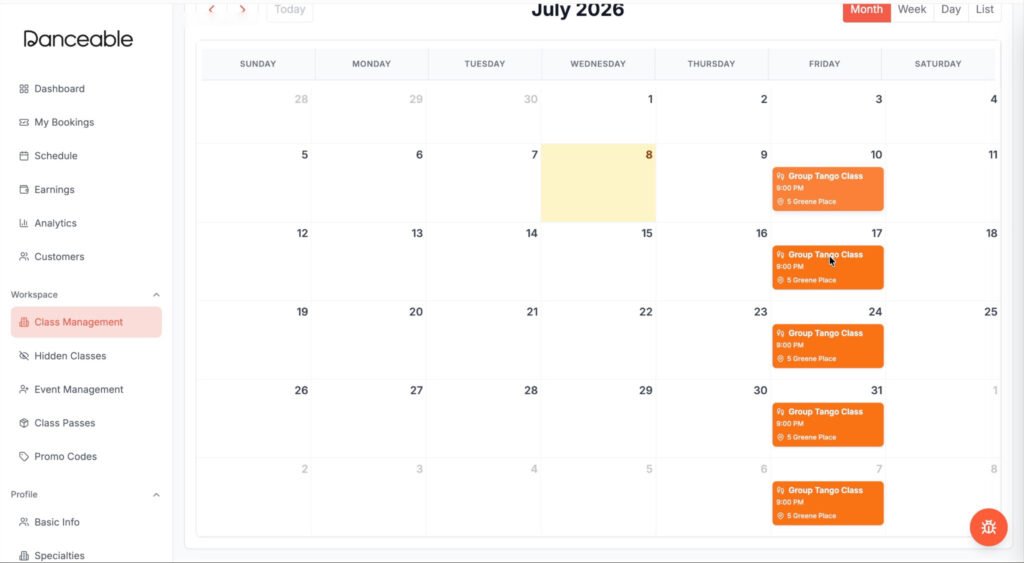
Danceable will confirm that the class has been created successfully. Your class will then appear in your schedule and become available to students.
Your first Danceable class is published
You have now created and published your first class on Danceable.
A completed listing might appear as:
9:00 PM every Friday in Lafayette, California
Take a final look at the public listing as a student would see it. Confirm that the most important information can be understood quickly and that students know exactly what they are booking.
Start creating your classes on Danceable
Danceable helps dance teachers publish their offerings, manage class information, and make it easier for students to discover opportunities to dance.
Create or access your Danceable account and publish your first class today.